kiss acrylic nail kit instructions
Kiss acrylic nail kits offer a convenient, at-home solution for achieving salon-quality nails. These kits empower beginners with everything needed for a stunning manicure.
What is a Kiss Acrylic Nail Kit?
Kiss acrylic nail kits are all-inclusive packages designed to bring the professional acrylic nail experience directly to your home. Typically, these kits contain acrylic powder in various shades, a liquid monomer essential for activating the powder, and a selection of tools.
You’ll find nail forms or pre-shaped tips for extending the nail, a brush for precise application, and a dappen dish to hold the monomer. Many modern kits even include a UV/LED lamp for gel polish application, offering versatility. These kits cater to both beginners and experienced users seeking convenience.
Benefits of Using a Kiss Acrylic Nail Kit
Kiss acrylic nail kits provide a cost-effective alternative to frequent salon visits, saving you both time and money. They offer creative freedom, allowing you to experiment with different colors, lengths, and designs from the comfort of your home.
These kits empower you to develop a new skill and enjoy a personalized manicure experience. The convenience of having all necessary supplies in one package eliminates the hassle of individual purchases, and the included instructions guide beginners through the process.

Kit Contents: A Comprehensive Overview
Kiss acrylic nail kits typically include acrylic powder, liquid monomer, nail forms, tips, a brush, and essential tools for application and shaping.
Acrylic Powder Varieties
Kiss acrylic nail kits often feature diverse powder options, catering to varied preferences and styles. Clear powder provides a natural look, ideal for overlays or sculpting. White powder is foundational for French manicures and vibrant color applications. Pink and nude shades offer subtle enhancements, mimicking natural nail tones beautifully. Glitter powders introduce sparkle and dimension, perfect for festive designs. Multicolor kits expand creative possibilities, allowing for unique blends and artistic expressions. The quality of the powder directly impacts the acrylic’s strength, flexibility, and overall aesthetic appeal, ensuring a durable and visually pleasing manicure.
Liquid Monomer Explained
Liquid monomer, a crucial component in Kiss acrylic nail kits, activates the acrylic powder, initiating the polymerization process. This chemical reaction transforms the powder and liquid into a moldable acrylic bead. Monomer quality significantly impacts the acrylic’s workability, adhesion, and yellowing resistance. Proper ventilation is essential when using monomer due to its strong odor. It’s vital to avoid skin contact, as it can cause irritation. The monomer-to-powder ratio is critical for optimal consistency and strength; following kit instructions precisely is paramount for successful application.
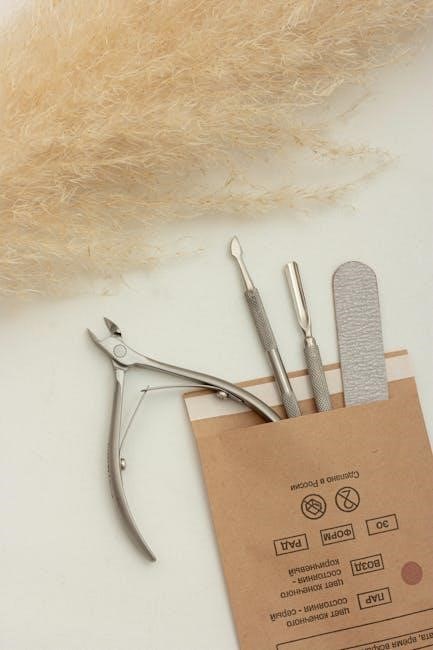
Essential Tools Included
Kiss acrylic nail kits typically contain a comprehensive set of tools for successful application. These commonly include nail forms or tips for extending the nail length, a brush for precise acrylic application, and a dappen dish to hold the liquid monomer. A nail file and buffer are essential for shaping and smoothing the acrylic. Often, kits also feature nail glue, cuticle pushers, and decorative elements like glitter or rhinestones, allowing for personalized designs. Having all these tools ensures a complete and convenient experience.
Nail Forms & Tips
Nail forms and tips are crucial components within a Kiss acrylic nail kit, offering options for nail extension. Nail tips are pre-shaped plastic pieces glued onto the natural nail, providing instant length. Nail forms, conversely, are stickers applied under the free edge, allowing you to sculpt the acrylic directly onto them for a more customized shape and length. Choosing between forms and tips depends on desired style and skill level; forms require more practice but offer greater flexibility in design.
Brush Selection
Brush selection is paramount when working with a Kiss acrylic nail kit. Typically, kits include a size 8 brush – a versatile choice for both beginners and experienced users. Kolinsky sable brushes are preferred for their superior acrylic pickup and smooth application. A round brush shape is ideal for creating the perfect acrylic bead. Maintaining brush cleanliness is vital; use brush cleaner after each application to prevent acrylic hardening within the bristles, ensuring longevity and optimal performance.
Dappen Dish & Acrylic Liquid
The dappen dish, a small glass or ceramic container, holds the acrylic liquid monomer. This monomer is crucial for activating the acrylic powder, forming a workable bead. Ensure proper ventilation when using the liquid, as it has a strong odor. Pour a sufficient amount of monomer into the dappen dish – avoid overfilling. Dip your brush into the monomer, then into the powder, creating the acrylic mixture. Always keep the monomer tightly sealed to prevent evaporation and maintain its consistency.

Preparing Your Natural Nails
Proper nail preparation is key for acrylic adhesion. Clean, sanitize, gently push back cuticles, and lightly buff the nail surface for optimal results.
Proper Nail Cleaning & Sanitation
Before beginning your acrylic application, thorough nail cleaning and sanitation are absolutely crucial. Start by removing any existing polish completely with a non-acetone remover, as acetone can dehydrate the nail. Wash your hands and each nail individually with warm, soapy water to eliminate oils, dirt, and bacteria.
Next, gently use a nail brush to scrub under the free edge of each nail. This ensures a pristine surface for product adhesion. Finally, apply a nail dehydrator or isopropyl alcohol to remove any remaining residue and further sanitize the nail plate, promoting a long-lasting and healthy manicure.
Pushing Back & Trimming Cuticles
Gentle cuticle care is essential for a flawless acrylic application. Begin by softening the cuticles with a cuticle remover or warm water. Using a cuticle pusher (metal or wooden), carefully push back the cuticles to create a clean nail bed. Avoid excessive force, which can damage the nail matrix.
Only trim hangnails or dead cuticle skin with a cuticle nipper; never cut live tissue. Over-trimming can lead to infection. A neat cuticle line ensures proper acrylic adhesion and a professional-looking finish. Remember, prioritize cuticle health!
Buffing the Nail Surface
Gentle buffing creates a slightly rough texture, enhancing acrylic adhesion. Use a fine-grit buffer to lightly remove the shine from your natural nails. Avoid aggressive buffing, as this can weaken the nail plate and cause damage. Focus on evenly removing the glossy surface, not thinning the nail.
Buffing also removes any residual oils or debris, ensuring a clean base for the acrylic. A properly prepped nail surface is crucial for long-lasting, bubble-free acrylics. Dust off thoroughly after buffing before proceeding.

Acrylic Application: Step-by-Step Guide
Begin with mixing the acrylic powder and liquid monomer to form a workable bead. Apply this bead to the nail, sculpting and shaping before it hardens.
Mixing the Acrylic Powder & Liquid
Achieving the perfect consistency is crucial for successful acrylic application. Carefully pour a small amount of liquid monomer into the dappen dish. Dip your brush into the monomer, then gently into the acrylic powder, creating a small bead.
The ratio is key – aim for a smooth, not-too-wet, not-too-dry consistency. Too wet will result in runny acrylic, while too dry will be difficult to shape. Practice makes perfect! A properly mixed bead should be self-leveling and easily manipulated on the nail.
Applying the Acrylic Bead
Once mixed, quickly but gently apply the acrylic bead to your prepared nail, starting near the cuticle but avoiding contact with the skin. Gently pat and press the bead into place, allowing it to self-level. Avoid dragging the acrylic, as this can create ridges.
Work quickly, as acrylic hardens rapidly. Build the acrylic towards the free edge, ensuring even distribution. Repeat this process, creating multiple beads if necessary, to achieve the desired length and shape; Remember to blend each bead seamlessly.
Shaping & Sculpting the Acrylic
After applying the acrylic, utilize a file to refine the shape and sculpt the desired nail form. Begin with a coarser grit file to remove bulk, then switch to a finer grit for smoothing. Pay attention to the sidewalls and apex, ensuring a balanced and structurally sound nail.
Carefully refine the shape – square, oval, almond, or stiletto – according to your preference. Regularly check the nail’s symmetry and evenness during the sculpting process; Dust off debris frequently for clear visibility.
Finishing Touches & Polishing
To complete your look, gently file and buff the acrylic nails for a flawlessly smooth surface. Apply your preferred polish and seal with a top coat!
Filing & Buffing for Smoothness
Achieving a professional finish with your Kiss acrylic nails relies heavily on meticulous filing and buffing. Begin with a coarser grit file to shape the nails and refine the overall structure, paying close attention to the sidewalls and free edge.
Gradually transition to a finer grit file to smooth out any imperfections and prepare the surface for polishing. Buffing is crucial; use a buffing block in gentle, sweeping motions to eliminate scratches and create a flawlessly even surface.
This step ensures optimal polish adhesion and a beautiful, glossy appearance. Remember to dust off any debris between grits for the best results!
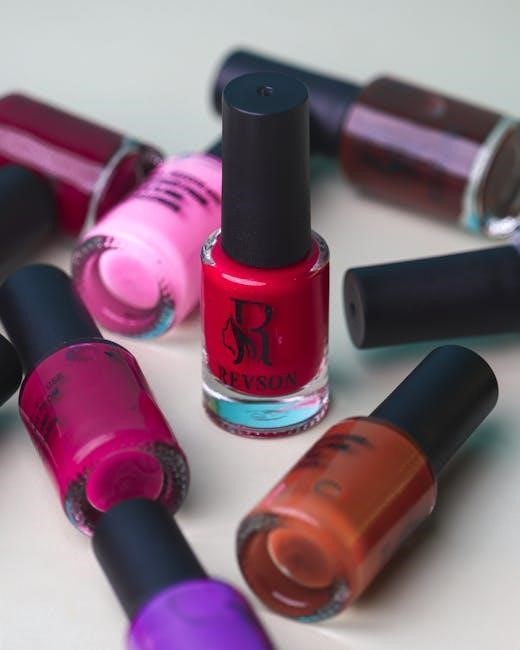
Applying Nail Polish or Gel Polish
Once your acrylic nails are flawlessly filed and buffed, it’s time to unleash your creativity with color! Begin with a thin, even coat of base coat to protect the acrylic and promote polish adhesion. Allow it to dry completely before applying your chosen nail polish or gel polish.
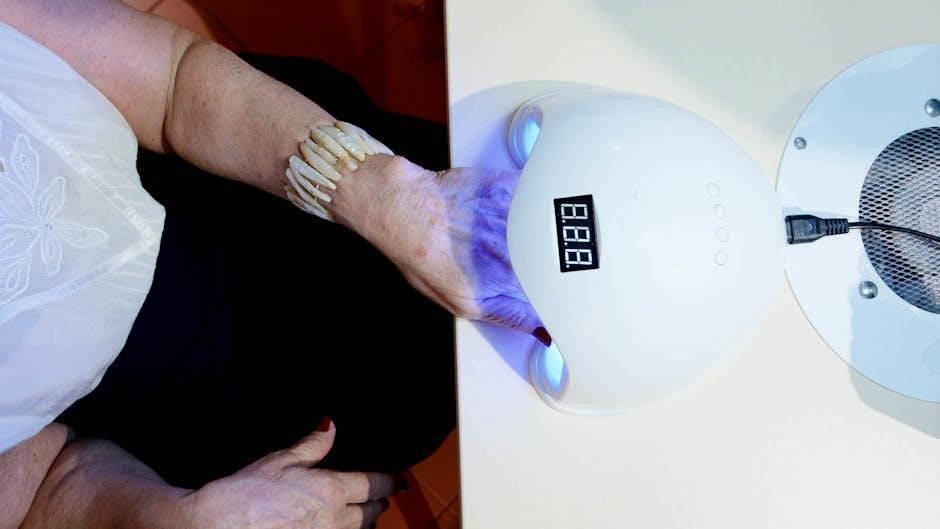
Apply two to three thin coats of color, allowing each coat to dry thoroughly. If using gel polish, remember to cure each coat under a UV/LED lamp according to the polish instructions.
Ensure complete coverage and avoid flooding the cuticles for a clean, professional look.
Top Coat Application for Shine & Protection
To seal in your beautiful nail art and provide lasting shine, a top coat is essential. Apply a generous, yet even, layer of top coat over your fully dried polish or gel polish. This step protects against chipping and adds a professional finish.
If using a regular top coat, allow it to air dry completely. For gel top coat, cure under a UV/LED lamp as directed by the product’s instructions.
Wrap the free edge of the nail with the top coat to prevent shrinkage and extend the life of your manicure;

Maintenance & Removal
Regular maintenance extends acrylic nail life; avoid harsh chemicals. Safe removal involves soaking in acetone, gently lifting softened acrylic, and moisturizing afterwards.
Proper Aftercare for Acrylic Nails
Maintaining healthy acrylic nails requires diligent aftercare. Regularly apply cuticle oil to nourish the nail bed and prevent dryness, promoting flexibility and preventing cracking. Avoid using your acrylic nails as tools, as this can lead to breakage and lifting.
When engaging in water activities, consider wearing gloves to minimize prolonged exposure, which can weaken the adhesive. Gently file any rough edges or chips promptly to maintain a smooth and polished appearance. Hydrate your hands frequently with a quality hand cream to keep the skin around your nails moisturized and healthy.
Finally, schedule regular fill-ins with a professional or utilize a touch-up kit to address growth at the base of the nail, ensuring a consistently flawless look and preventing potential lifting issues.
Safe Acrylic Nail Removal Techniques
Removing acrylic nails safely is crucial to prevent damage to your natural nails. Avoid forceful peeling, as this removes layers of your natural nail plate. Instead, clip the acrylic nails down as much as possible.
Soak cotton balls in acetone, place them on each nail, and wrap with foil for 15-20 minutes. Gently push off softened acrylic with a cuticle pusher; repeat if necessary.
Buff the nail surface to remove any remaining residue, then hydrate with cuticle oil and hand cream. Patience is key – rushing the process can cause significant nail damage.
Troubleshooting Common Issues
Common issues like lifting, bubbles, or yellowing can occur. Proper prep, mixing ratios, and avoiding skin contact are vital for flawless results.
Dealing with Lifting
Lifting, where the acrylic separates from the natural nail, is a frequent concern. Thorough nail preparation is paramount; ensure complete removal of oils and a slightly textured surface for optimal adhesion. Avoid flooding the cuticle area during application, as this increases lifting risk.
If lifting occurs, gently file down the lifted portion and reapply acrylic, focusing on proper technique. Consider using a nail dehydrator and primer to enhance bonding. Consistent aftercare, avoiding excessive water exposure and trauma, will also minimize lifting. Addressing it promptly prevents further issues.
Preventing Bubbles in Acrylic
Bubbles within the acrylic can compromise the nail’s strength and appearance. Proper mixing technique is crucial: avoid vigorously stirring the powder and liquid, as this introduces air. Instead, gently rock or swirl the dappen dish to combine. Work quickly, as the acrylic sets rapidly, reducing bubble formation.
Ensure your brush is fully loaded with acrylic but not overloaded. Applying even pressure and a smooth bead placement minimizes air pockets. If bubbles appear, lightly tap the area with your brush to release them before the acrylic hardens.
Addressing Acrylic Yellowing
Yellowing of acrylic nails can occur due to prolonged exposure to UV light or certain nail polish pigments. To minimize this, consistently apply a UV top coat, acting as a protective barrier. Avoid using heavily pigmented or low-quality polishes directly on the acrylic.
Proper storage of acrylic liquid is also vital; keep it in a dark, airtight container. If yellowing persists, gently buff the surface before re-applying polish. Consider a clear acrylic base for brighter color adhesion and reduced discoloration.
Advanced Techniques (Optional)
Elevate your skills with ombre effects and intricate nail art designs using your Kiss kit! Practice layering colors and adding embellishments for unique looks.
Ombre Acrylic Nails
Creating a seamless ombre effect with your Kiss acrylic nail kit requires practice and a delicate touch. Begin by applying a base layer of your lighter acrylic shade, extending it slightly past the desired ombre transition point. Next, carefully apply a bead of your darker shade, blending it into the lighter color while still wet.
Utilize a clean brush dipped in monomer to gently feather the edges, eliminating harsh lines. Building up the color gradually is key to achieving a smooth gradient. Remember to work quickly before the acrylic hardens. Experiment with different color combinations for personalized, stunning ombre nails!
Acrylic Nail Art Designs
Unleash your creativity with the diverse designs possible using your Kiss acrylic nail kit! Once the acrylic is applied and shaped, utilize the included brushes for intricate artwork. Incorporate glitter powder for a sparkling effect, or employ nail art rhinestones for added glamour.
Experiment with striping tape to create geometric patterns, or use a fine-tipped brush and acrylic paint for detailed floral designs. Remember to seal your artwork with a top coat for lasting shine and protection. Explore online tutorials for inspiration and elevate your nail art skills!
Safety Precautions
Prioritize safety when using your Kiss acrylic kit! Ensure adequate ventilation, consider a mask, and avoid direct skin contact with acrylic liquids and powders.
Ventilation & Mask Usage
Proper ventilation is crucial when working with acrylics. The fumes released during mixing and application can be strong and potentially harmful. Always work in a well-ventilated area, ideally with an open window or a dedicated ventilation system.
Consider wearing a dust mask or respirator to avoid inhaling acrylic particles and fumes. These particles can irritate the respiratory system and cause allergic reactions in sensitive individuals. A mask helps filter out these airborne substances, protecting your lungs.
Even with ventilation, a mask provides an extra layer of protection, ensuring a safer and more comfortable experience during your acrylic nail application process. Prioritize your health and well-being!
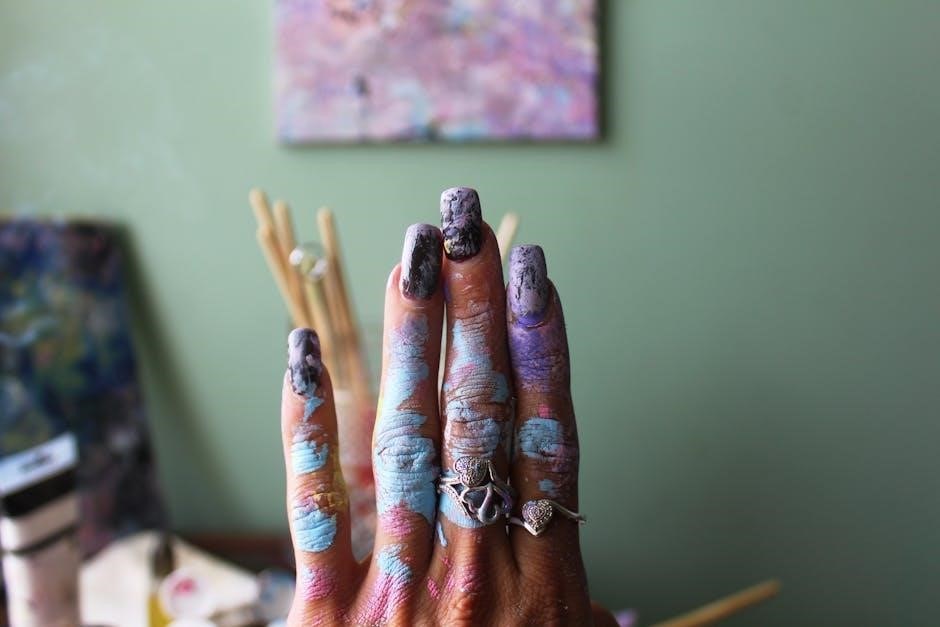
Avoiding Skin Contact with Acrylics
Direct skin contact with acrylic liquids and powders should be strictly avoided. These substances can cause irritation, allergic reactions, and even sensitization over time. Wear gloves – nitrile or vinyl are recommended – to protect your hands during the entire application process.
If acrylic accidentally contacts your skin, immediately wash the affected area with soap and water. Do not scrub vigorously, as this can worsen irritation. Avoid using harsh chemicals or solvents to remove acrylic from your skin.
Protecting your skin is paramount for a safe and enjoyable experience with your Kiss acrylic nail kit. Prioritize skin health and follow these preventative measures diligently.


Leave a Reply
You must be logged in to post a comment.