amico ceiling fan manual
Welcome to the Amico Ceiling Fan Manual, your comprehensive guide to understanding, installing, and maintaining your ceiling fan․ This manual is designed to be user-friendly, ensuring you can optimize your fan’s features for maximum comfort and efficiency․ Inside, you’ll find detailed instructions, safety precautions, and troubleshooting tips to help you enjoy your Amico ceiling fan seamlessly․
1․1 Overview of the Amico Ceiling Fan
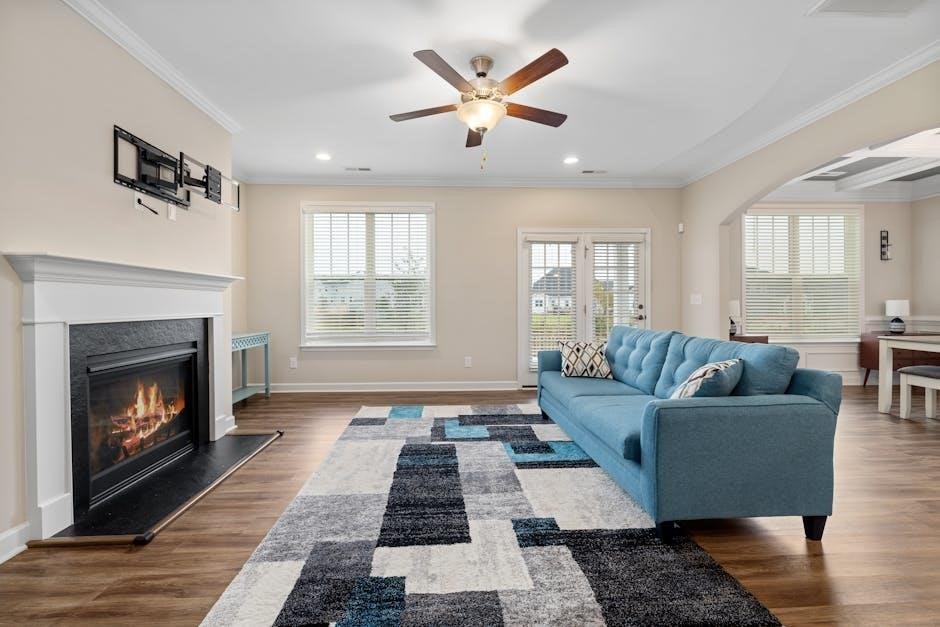
The Amico Ceiling Fan is a modern, energy-efficient solution for home comfort, offering sleek designs, quiet operation, and advanced features like reversible motors and smart controls․ Designed for versatility, it includes multiple speed settings, dimmable lighting options, and an auto-off timer․ This fan blends functionality with aesthetics, making it a practical and stylish addition to any room, while ensuring optimal airflow and energy savings․
1․2 Importance of Reading the Manual
Reading the Amico Ceiling Fan Manual is essential for safe installation, optimal performance, and understanding its features․ It provides critical information on electrical safety, troubleshooting, and maintenance․ By following the guidelines, you can ensure proper functionality, prevent potential hazards, and maximize energy efficiency․ The manual also outlines warranty details and customer support options, making it a vital resource for a seamless user experience․
Installation Steps for Amico Ceiling Fans
Installing your Amico Ceiling Fan is straightforward with the provided instructions․ Follow the step-by-step guide to ensure proper mounting, wiring, and setup for optimal performance․
2․1 Pre-Installation Requirements
Before installing your Amico ceiling fan, ensure the ceiling is sturdy and can support the fan’s weight․ Verify the electrical connections are compatible and turn off the power supply․ Gather all tools and hardware from the box, and read through the manual to familiarize yourself with the process․ Ensure the area is clear and safe for installation․
2․2 Step-by-Step Installation Guide
Start by turning off the power supply at the circuit breaker․ Mount the ceiling bracket securely to the ceiling․ Attach the fan motor to the bracket, ensuring it is level․ Connect the wiring carefully, matching the colors as specified․ Install the fan blades and light kit, following the manual’s instructions․ Finally, turn the power back on and test the fan’s operation at all speed settings․

Product Features and Specifications
The Amico ceiling fan features a modern design, reversible DC motor, 6-speed control, and dimmable LED lights․ It offers energy-efficient operation with quiet performance and sleek aesthetics․
3․1 Design and Build Quality
The Amico ceiling fan boasts a sleek, modern design with high-quality materials, ensuring durability and aesthetic appeal․ Its slim profile and reversible blades blend seamlessly with various interior styles․ Built with a robust DC motor, the fan provides smooth, quiet operation while maintaining energy efficiency․ The construction emphasizes stability, with features like a secure mounting system for reliable performance and safety․
3․2 Technical Specifications
The Amico ceiling fan features a powerful yet energy-efficient DC motor, offering six speed settings for customizable airflow․ It includes a reversible function for seasonal use and operates silently․ The fan is equipped with a 3CCT (Color Temperature) lighting system, allowing adjustments from warm to natural white light․ Its durable construction ensures long-lasting performance, with a robust mounting system for stability and safety․
Operating Instructions
This section provides step-by-step guidance on operating your Amico ceiling fan, including fan speed adjustment, light dimming, and utilizing the auto-off timer for convenience;
4․1 Fan Speed Control
The Amico ceiling fan features six adjustable speed settings, allowing you to customize airflow to suit your comfort needs․ Use the remote control to seamlessly transition between speeds or switch the fan’s direction with the Forward/Reverse button․ The fan also includes a Natural Wind mode, simulating gentle breezes for a more natural cooling experience․ Operate effortlessly with the whisper-quiet motor, ensuring efficient performance and energy savings․
4․2 Light Dimming and Color Temperature
The Amico ceiling fan features a dimmable light system with three color temperature options: warm white, natural, and cool daylight․ Adjust brightness and color using the remote control for customizable ambiance․ The 3CCT technology ensures smooth transitions between warm and cool tones, while the dimming function allows precise light level control․ This feature enhances energy efficiency and provides versatile lighting solutions for any setting․
Troubleshooting Common Issues
Identify and resolve common issues like flickering lights or unusual noise․ Check connections, clean blades, and ensure proper installation․ Refer to the manual for detailed solutions․
5․1 Diagnosing Fan Malfunctions
Start by identifying symptoms like flickering lights or unusual noise․ Check power connections and ensure blades are clean․ Verify proper installation and balance․ Consult the manual for step-by-step troubleshooting guides․ If issues persist, reset the fan or remote control․ Always follow safety precautions when diagnosing electrical components to avoid further damage or hazards․
5․2 Resetting the Fan and Remote Control
To reset your Amico ceiling fan and remote control, first turn off the fan using the power switch․ Wait for 10 seconds, then press and hold the reset button on the remote while turning the fan back on․ Release the button when the light blinks, indicating the reset is complete․ This process restores default settings and resolves many connectivity issues․ Always ensure the fan is powered off before resetting․
Maintenance and Upkeep
Regular cleaning of fan blades and lubricating moving parts ensures smooth operation․ Check and replace remote batteries as needed․ Maintain proper airflow for optimal performance and longevity․
6․1 Cleaning the Fan Blades
To maintain your Amico ceiling fan’s efficiency, clean the blades regularly․ Turn off the power, then wipe each blade with a soft, dry cloth․ For stubborn dust, dampen the cloth slightly but avoid harsh chemicals․ Ensure the fan is cool before cleaning to prevent accidents․ Regular cleaning prevents dust buildup, ensuring optimal airflow and a sleek appearance․ Inspect blades periodically for dirt or damage․
6․2 Lubricating Moving Parts

Regular lubrication of moving parts ensures smooth operation and minimizes noise․ Use a silicone-based lubricant on the motor and hinges․ Turn off the power, apply a few drops, and gently operate the fan to distribute the lubricant evenly․ Avoid over-lubrication to prevent damage․ Lubricate every 6 months or when you notice increased noise․ This maintenance extends the fan’s lifespan and maintains its efficiency․
Warranty and Customer Support
Your Amico ceiling fan is backed by a comprehensive warranty covering manufacturing defects․ For inquiries or assistance, contact Amico Customer Service via phone, email, or their official website․
7․1 Warranty Coverage Details
The Amico ceiling fan warranty covers manufacturing defects for a specified period, typically ranging from 1 to 5 years, depending on the product․ This includes replacement of faulty parts and repairs․ The warranty is valid from the purchase date and requires proof of purchase․ For details, refer to the warranty section in your user manual or contact customer support․
7․2 Contacting Amico Customer Service
For assistance, contact Amico Customer Service via email, phone, or live chat․ Support is available 24/7 for inquiries, troubleshooting, and warranty claims․ Visit the official website for contact details and a support form․ Ensure you have your product model number and purchase date ready for faster assistance․ You can also access support through the Amico AI-powered chat for immediate help with your ceiling fan․

Safety Precautions
Always turn off power before installation or maintenance․ Keep children away from moving parts․ Avoid exposing the fan to water or extreme temperatures․ Use only approved light bulbs and follow manufacturer guidelines to ensure safe operation․

8․1 Electrical Safety Guidelines
Always disconnect power before installing or servicing the fan․ Use a grounded outlet to prevent electrical hazards․ Avoid exposing the fan to water or moisture․ Never modify the fan’s wiring or components․ Keep children away from electrical parts․ Use only Amico-approved light bulbs and accessories to ensure safe operation․ Follow all local electrical codes and regulations for installation and maintenance․
8․2 Operating the Fan Safely
Always operate the fan in a well-ventilated area and avoid exposing it to extreme temperatures․ Keep the fan out of reach of children and pets․ Use the remote or wall control to adjust settings, and never touch the fan blades while they are in motion․ Ensure the fan is installed in a dry environment and avoid using it near water sources․ Follow the manual’s guidelines for safe and efficient operation․
Remote Control Functions
The remote control allows you to adjust fan speed, dim the light, and change color temperature․ It also features a reverse function and timer for convenience․
Program the remote to customize settings, ensuring seamless control over your Amico ceiling fan’s operations for optimal comfort and energy efficiency throughout the year․
9․1 Using the Remote Control
The remote control simplifies fan and light operation․ Use the Fan Speed button to cycle through six speeds, and the Light Dimmer for brightness adjustment․ The Forward/Reverse button changes blade direction, while Color Temperature adjusts light tone․ Pressing Natural Wind mimics outdoor breezes․ The Auto-Off timer shuts the fan off after two hours, enhancing convenience and energy savings․
9․2 Programming the Remote
Programming the remote allows customization of your Amico ceiling fan experience․ Start by syncing the remote to the fan․ Press and hold the Power and Fan Speed buttons for 3 seconds․ Use the Light Dimmer to set brightness levels․ Enable the Auto-Off timer by pressing the Timer button and selecting your desired duration․ Customize Color Temperature by holding the Light Dimmer until your preferred tone is reached․
Energy Efficiency and Benefits
The Amico ceiling fan features advanced energy-efficient technology, a reversible motor for year-round use, and contributes to environmental benefits by reducing energy consumption․
10․1 Energy-Saving Features
The Amico ceiling fan incorporates DC motor technology, reducing energy consumption by up to 50%․ With 6 speed settings and a reversible function, it optimizes airflow while minimizing power usage․ The auto-off timer and dimming capabilities further enhance energy efficiency, making it an eco-friendly choice for modern homes․
10․2 Environmental Benefits
The Amico ceiling fan promotes eco-friendliness with its energy-efficient DC motor, reducing power consumption and lowering carbon emissions․ By using LED lighting and smart features like auto-off timers, it minimizes energy waste․ The reversible operation optimizes airflow year-round, reducing the need for excessive heating or cooling․ This makes it a sustainable choice for environmentally conscious homeowners seeking to lower their energy footprint and contribute to a greener planet․
11․1 Final Tips for Optimal Use
To get the most out of your Amico ceiling fan, always follow the manual’s guidelines for installation and maintenance․ Regularly clean the blades to maintain airflow efficiency and ensure quiet operation․ Use the remote control to adjust fan speed and light settings for optimal comfort․ For energy savings, utilize the timer and reversible features․ Lastly, check for firmware updates to keep your fan performing at its best․
11․2 Encouragement for Feedback
Your feedback is invaluable! Share your experiences with the Amico Ceiling Fan by visiting our official website or contacting customer support․ Your insights help us refine features, improve performance, and ensure customer satisfaction․ We appreciate your time and look forward to hearing your thoughts to continuously enhance our products and services for a better user experience․


Leave a Reply
You must be logged in to post a comment.